How To Install Cellulose Insulation
Cellulose insulation is being used more commonly in both commercial and residential projects. Although more and more contractors are working with cellulose, you can also do it yourself if you have the right equipment and a little training.
What type of equipment do you need?
For cellulose insulation, you have a few choices, and the equipment you'd need depends on your chosen method of installation. If you're looking to insulate your attic, you'll be using loose-fill blown insulation. For loose fill, you would need the following equipment:
- Cellulose Insulation - These are packed blocks of cellulose fiber. They come in large plastic bags. A pack that is large enough to cover 60+ sq. ft. will weigh around 30 lbs.
- A Simple Cutter - This is for opening the insulation bags. If you open it neatly, and then pull it off carefully, you can use the bag for a garbage. Just staple it to a stud and use it to toss your excess scraps.
- A Blower - This will project your loose-fill into the area. This is why it's called "blown" insulation. If this is just a one-time job, you can rent these at Home Depot.
- Extension Cord - You'll need to move around, so just get a good extension cord and save yourself some trouble later.
- A Good Light - This is especially important if you're working with an attic, or maybe it's a new build that doesn't have light fixtures installed yet.
Note: It is important to keep in mind that you may need a large number of packs for your attic. It's easy to underestimate how much insulation can fit into a given space. So, don’t panic when buying a large quantity, because it is fairly affordable when compared to foam and other modern options. It's best to use an insulation calculator to figure your exact amount needed, and then plan a little extra just to be sure. This way you won’t have to stop the partway into the messy procedure and run back to the store.
Installation Process: Loose-fill in the Attic
Your blower will have a hopper. That's where the insulation feeds into the machine. Place your bag on top of the hopper and cut the bag in half. Why do we cut it on top of the hopper? So that the insulation falls right into the machine, instead of on the floor.
Set one half of the bag aside while you pour the other half into the hopper. (It probably won't fit the whole bag.) You won't really be pouring as much as you'll be digging it out of the bag by hand. Wear gloves.
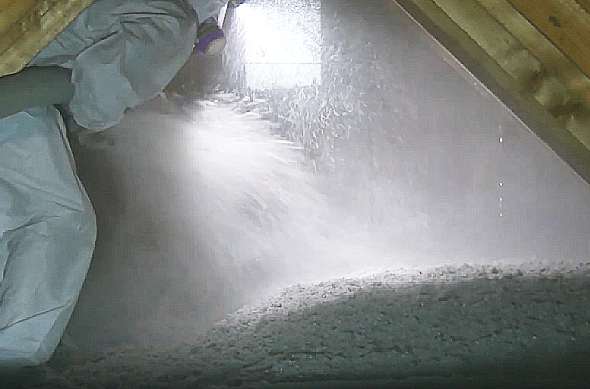
Once you've loaded up your hopper, all you need to do is aim the blower nozzle and switch on the machine. The cellulose will blast from the blower, allowing you to fill hard to reach spaces. Move the hose side to side to get good, even coverage. Make sure to fill all the little spaces, because air will easily find any spot you've missed.
You'll be able to run the machine for about 3 minutes before you run out of cellulose. Just switch off the machine and refill the hopper.

That's the general idea of blown cellulose. However, in practice, there are a few more details you'll want to know.
The blower is loud, and it's heavy. You won't be dragging it around the house with you. You may want to have it in a garage or outdoors. This will be fine, because it comes with a very long hose that will reach surprisingly far.
You're definitely not going to be hauling your blower into your attic. This makes turning the machine on a little tricky, because when you're in the attic with the hose, you can't exactly reach the machine to turn it on. If you can enlist a helper, you're all set. If not, you'll need to find a way to keep the hose pointed into the attic while you access the machine elsewhere. You may want to use a bungee cord to strap it into the rafters. That way the hose won't fly away when you turn it on.
If you don't want to crawl through your attic to get all the distant corners, you'll need to improvise. You can make extensions to the blower hose using 4" PVC pipe. Just hold it on with packing tape or duct tape.
Filling a space with cellulose is a fairly straightforward job, but that doesn't necessarily mean it will be quick. One of the hardest steps is cleanup. Using a blower is a messy operation, and fibers will fill the air, leaving a layer of dust in the surrounding area.
Installation Process: Dense Pack in the Walls
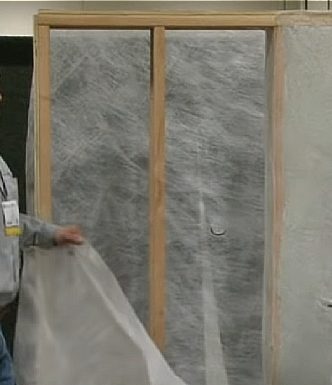
Dense pack is a unique installation process. In a new build situation, you have empty space between the studs, and you need to cover this space to make an enclosed cavity. Using a clear plastic stapled to the studs, you can prepare your wall to be insulated. Once the plastic is applied, a hole must be cut in the plastic. Given that you will be blowing cellulose into the wall, you would assume the hole should be near the top. However, this process is a little different, so you'll need to make the hole near the middle of the wall's height.
With the hole cut, insert a rigid pipe attached to your blower hose. The rigidness will allow you to aim exactly where you need within the wall. Start by blowing insulation into the bottom first. As the bottom gets packed densely, slowly pull the hose out of the hole, raising its height in the wall. Work your way up to the middle and stop. Now we need to place the hose at the top and work downward. Once the entire cavity is filled densely, you'll notice it protrudes slightly beyond the framework of the wall. This can make it tough for the drywall contractor to get the sheet rock in place. To avoid this, a metal roller, which looks like a paint roller, can be used to pack the cellulose until it is flush with the framework. You don't want to pack it tighter than that, because as it is compressed it loses the air pockets that aid its insulating qualities.

Installation Process: Wet Spray on the Walls
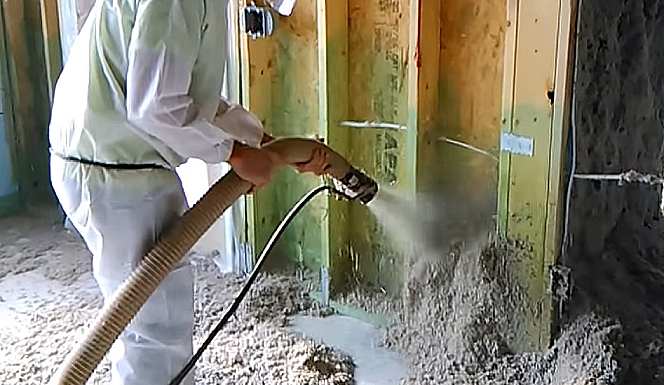
Wet spray is a unique process. Because liquid is involved, you'll need a special attachment to the blower hose. This attachment sprays a mist of water on the cellulose as it leaves the tube. The water is meant to activate an adhesive that comes on the cellulose. This means that you'll need cellulose that is meant for wet spray, rather than just standard loose fill. Because it's sticky, no plastic barrier will be needed to contain the insulation.
One note worth making. We're always trying to avoid moisture with insulation, so why is wet spray okay? First, it's only damp enough to activate the glue. If you can pick up some of the insulation and wring water out of it, it's too wet. Second, it is given time to dry before the drywall goes up.
Once your blower is loaded and your spray mist attachment is fixed, you can begin plastering the damp insulation between the studs. Work your way from bottom to top, trying to get a good, even fill. This was the easy part.
Now that you've blasted insulation into the wall, you have a huge mess on your hands. Not all of it will stick, and it will be all over the floor. The cellulose that did stick is lumpy and not uniform. You'll need to scrape down the sides to make it even with the wall. This makes an even bigger pile on the floor that must be vacuumed up. The waste material can be reused, however it will be extra moist the second time it passes through the spray mist attachment.

Why would you use wet spray? It's fast. It blows out of the machine and sticks to the wall. It takes about a minute to spray a standard cavity between studs. Its downside is the massive amount of cleanup.
How To Install Cellulose Insulation Without a Blower
Is it possible to install cellulose without a blower? Technically, yes. It's not going to be easier or more convenient, but at least you can save the rental fee on equipment. If you only have a small space, it's not difficult to stuff it in by hand, but you may find it's more tedious than expected. Spreading it by hand allows you to divide it up evenly and adjust as necessary, whereas using a blower is sort of a brute force method that's not quite as precise. If you've got a large space, you'll be better off using a blower, because manually installing cellulose can be pretty time-consuming.
